第12 屆iT邦幫忙鐵人賽系列文章 (Day26)
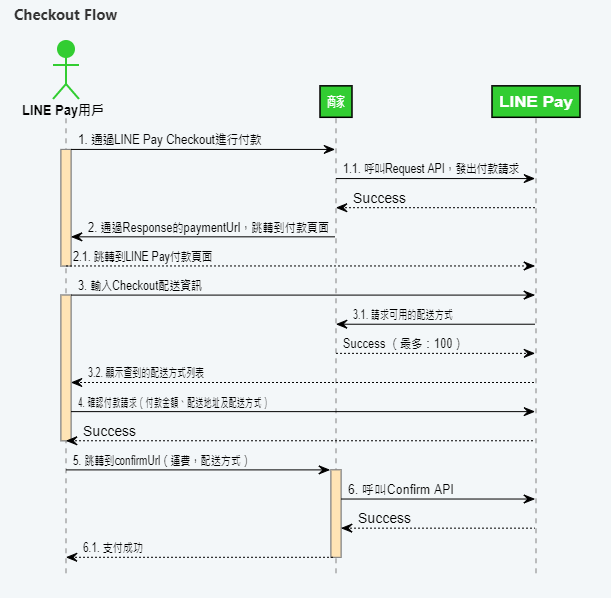
以下是 Line 官方文件的流程,今天會依據這個圖的流程來實作 Line Pay 付款
 https://pay.line.me/jp/developers/apis/onlineApis?locale=zh_TW
Checkout 流程
官方API文件可以從這裡看到

Request Body 的 C# Class
public class LinePayRequest

{

public int amount { get; set; }

public string currency { get; set; }

public string orderId { get; set; }

public List<Package> packages { get; set; }

public Options options { get; set; }

public Redirecturls redirectUrls { get; set; }

}

public class Package

{

public string id { get; set; }

public int amount { get; set; }

public string name { get; set; }

public List<Product> products { get; set; }

}

public class Product

{

public string id { get; set; }

public string name { get; set; }

public string imageUrl { get; set; }

public int quantity { get; set; }

public int price { get; set; }

}

public class Options

{

public Payment payment { get; set; }

}

public class Payment

{

public bool capture { get; set; }

}

public class Redirecturls

{

public string confirmUrl { get; set; }

public string cancelUrl { get; set; }

}
整個 Post 的 Body 可以這樣組成,channelId和channelSecret可以在前一篇申請sandbox時候取得
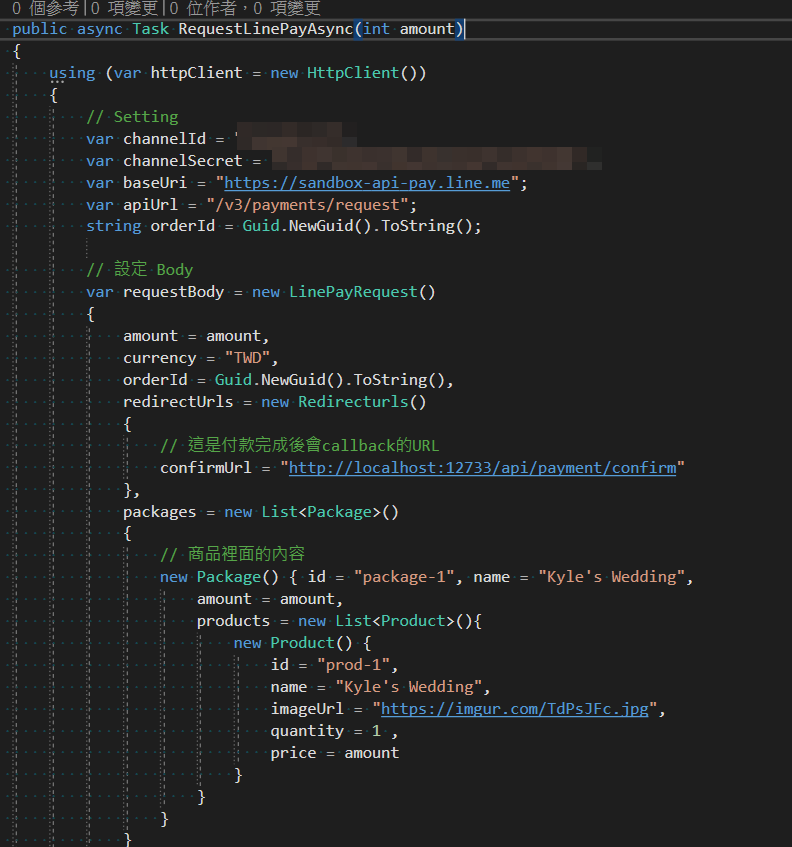
但 Line Pay 在發 Request 的時候必須把 PostBody 加密,寫了個 method 處理
string Signature = HashLinePayRequest(channelSecret, apiUrl, body, orderId, channelSecret);

private static string HashLinePayRequest(string channelSecret, string apiUrl, string body, string orderId, string key)

{

var request = channelSecret + apiUrl + body + orderId;

key = key ?? "";

var encoding = new System.Text.UTF8Encoding();

byte[] keyByte = encoding.GetBytes(key);

byte[] messageBytes = encoding.GetBytes(request);

using (var hmacsha256 = new HMACSHA256(keyByte))

{

byte[] hashmessage = hmacsha256.ComputeHash(messageBytes);

return Convert.ToBase64String(hashmessage);

}

}
在 Post 的時候 Header 也要加一些 Line 的驗證資訊

result 可以用 JSON.NET轉強行別
JsonConvert.DeserializeObject<LinePayResponse>(result)
LinePayResponse.cs
public class LinePayResponse

{

public string returnCode { get; set; }

public string returnMessage { get; set; }

public Info info { get; set; }

}

public class Info

{

public Paymenturl paymentUrl { get; set; }

public long transactionId { get; set; }

public string paymentAccessToken { get; set; }

}

public class Paymenturl

{

public string web { get; set; }

public string app { get; set; }

}
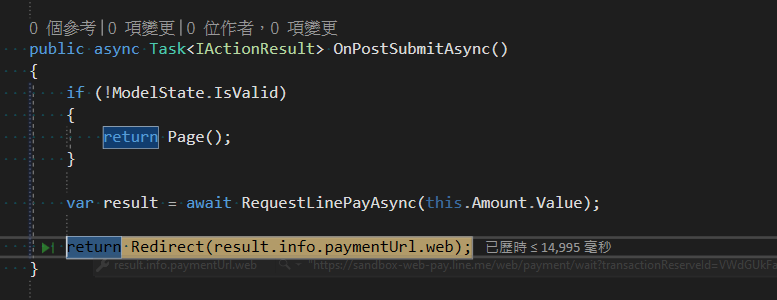
在 Razor Page 導頁到 Line Server 進行付款
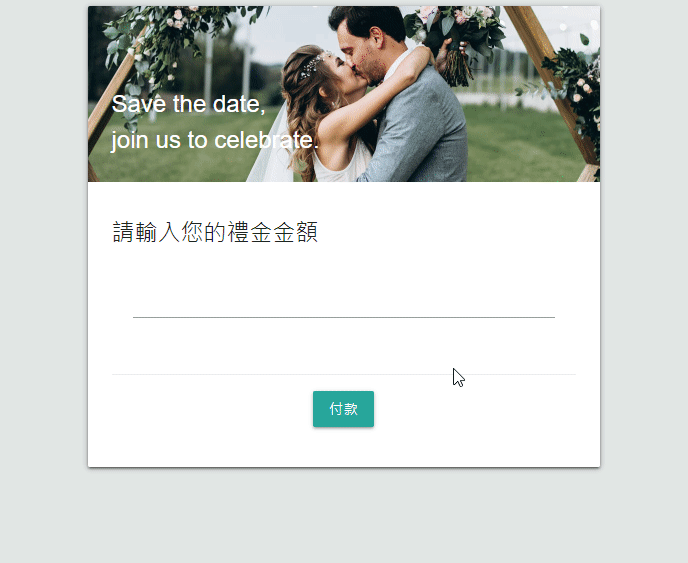
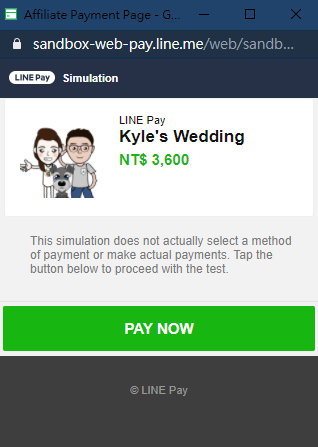
實作效果
登入Line或掃QR Code的付款畫面
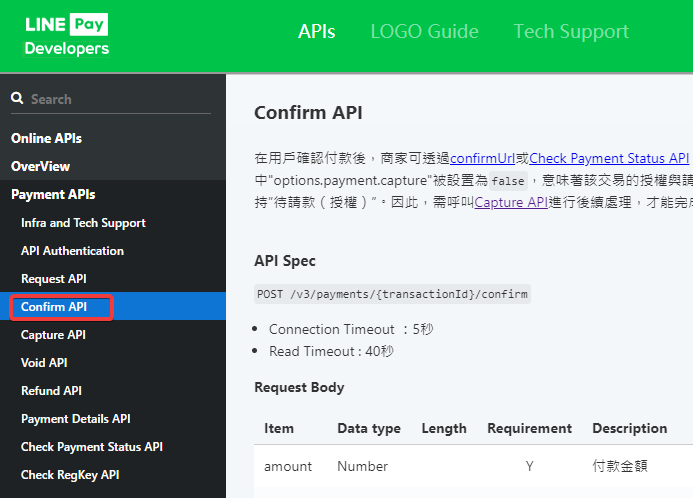
Confirm 流程
再來要做付完款的 callback 流程 官方API文件可以從這裡看到
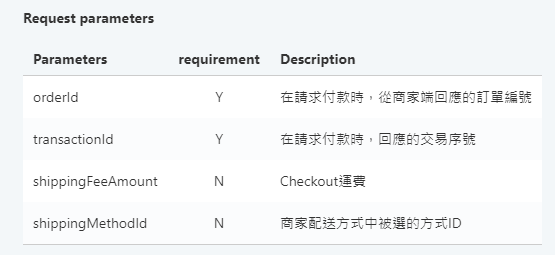
Callback 可以接收 Line 這四個參數
在剛剛發送Request時我們設定callback的URL是 http://localhost:xxx/api/payment/confirm,我們開個Api來接他,能正確取得剛剛所指定的 OrderId,就能去做後續實作啦,標記該朋友已經付過禮金了 (本系列文章就不實作完成了)

懶人包,本次學到了什麼?
- 看文件用C#串Line Pay https://pay.line.me/jp/developers/apis/onlineApis?locale=zh_TW